1. Tone balancing: First Step
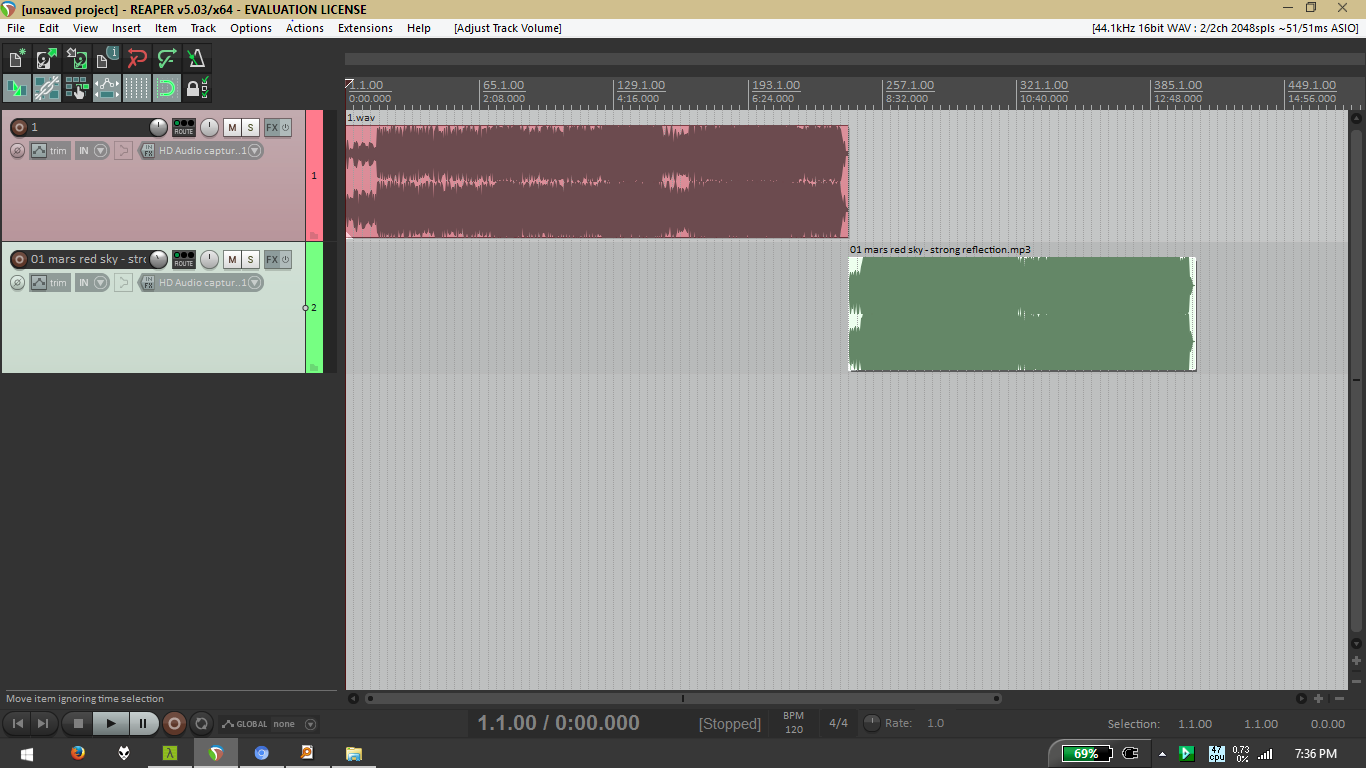
Fig 1: Initial layout
In this stage we attempt to appropriately balance the various frequency ranges from low to high. Imagine making a burger; in order to make a delicious burger we try to ensure that our delicious toppings are spread evenly over the various parts of the sandwich. There’s nothing worse than a burger with all its pickles in one corner and all the mayonnaise in another. Similarly, we try make sure there aren’t any inappropriate frequency imbalances during mastering.
As a working example, we’ll be using Reaper and two other plugins for tone balancing. Firstly, drag you mix into Reaper. It will appear as the first track. In the example above its name is “1.wav” as can be seen above the waveform. Next, drag your reference mix into a separate track and drag it till the two waveforms don’t overlap.
The next step is to balance the volumes of your two tracks. You can refer to the meters in Reaper’s mixer to set the rough volumes, but you will need to subsequently adjust by ear, as loudness is difficult to assess solely through meters.
2. Setting Up Markers
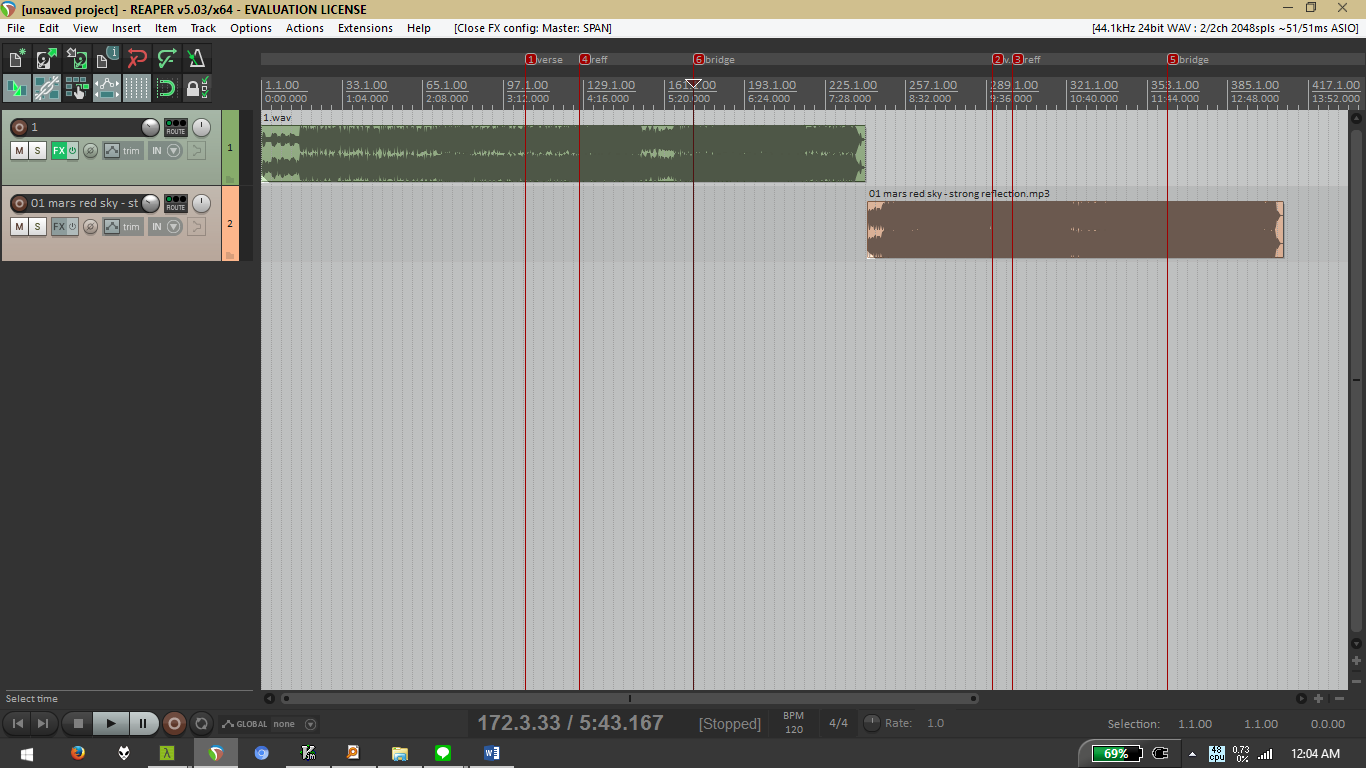
Fig 2: Setting up markers
Next, we’d like to set markers to quickly jump between various points in our mix and reference mix. In Fig 2, you’ll see that I’ve set markers for “verse”, “reff”, and “bridge” in both songs. To set a marker in Reaper simply press “Shift+M” at the appropriate point in the ruler. During playback, to jump to a specific marker press the number associated with the marker. For instance, to jump to the verse of our reference mix press “2”;
To compare the tones of our two mixes we’ll be relying primarily on our ears. This takes lots of practice; when listening to songs always try to critically separate the frequency ranges, and if possible do this while referring to a spectrum/frequency analyzer in your music player of choice. This way you’ll get a better feel for the different frequency ranges in songs. In addition, try out some ear training tools and games; Mr. Soundman is a popular frequency ear training game available online for free.
3. Analyzing the frequency
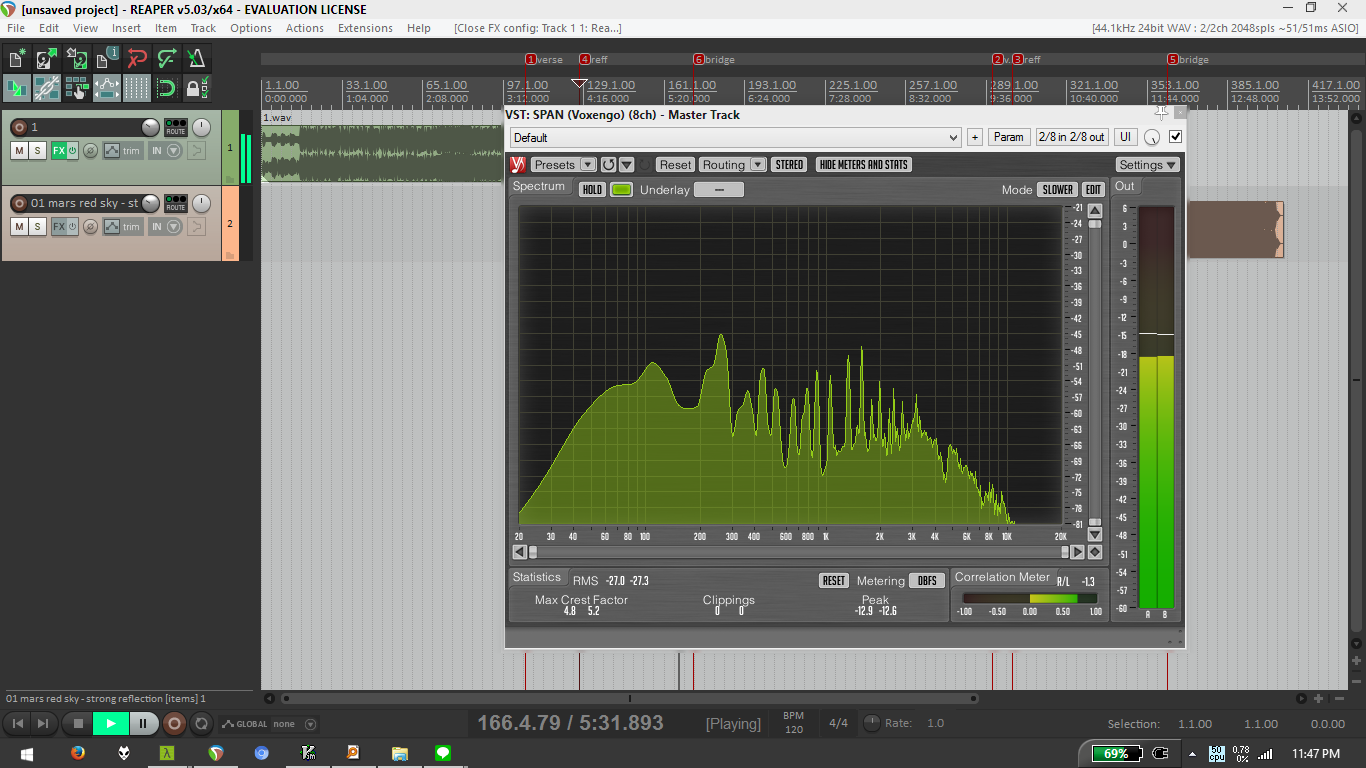
Fig 3: Frequency Analyzer
In addition to our ears, we will (optionally) use a frequency/spectrum analyzer. A good free example is Voxengo Span, although most DAW will come with a decent spectrum analyzer. Be sure to choose the appropriate (32 or 64-bit) plugin for your Reaper version. Play around with the settings; the “Default”, “Slower”, and “Master” options specify different release time for the spectrum envelope, in essence determining how “fast” the analyzer responds to transients. As we’ll be doing tone balancing, we want a slower setting to get a better idea of the “shape” of our mixes. Fig 3 shows Voxengo Span in the “Slower” setting.
4. Tone Balancing/Equalization
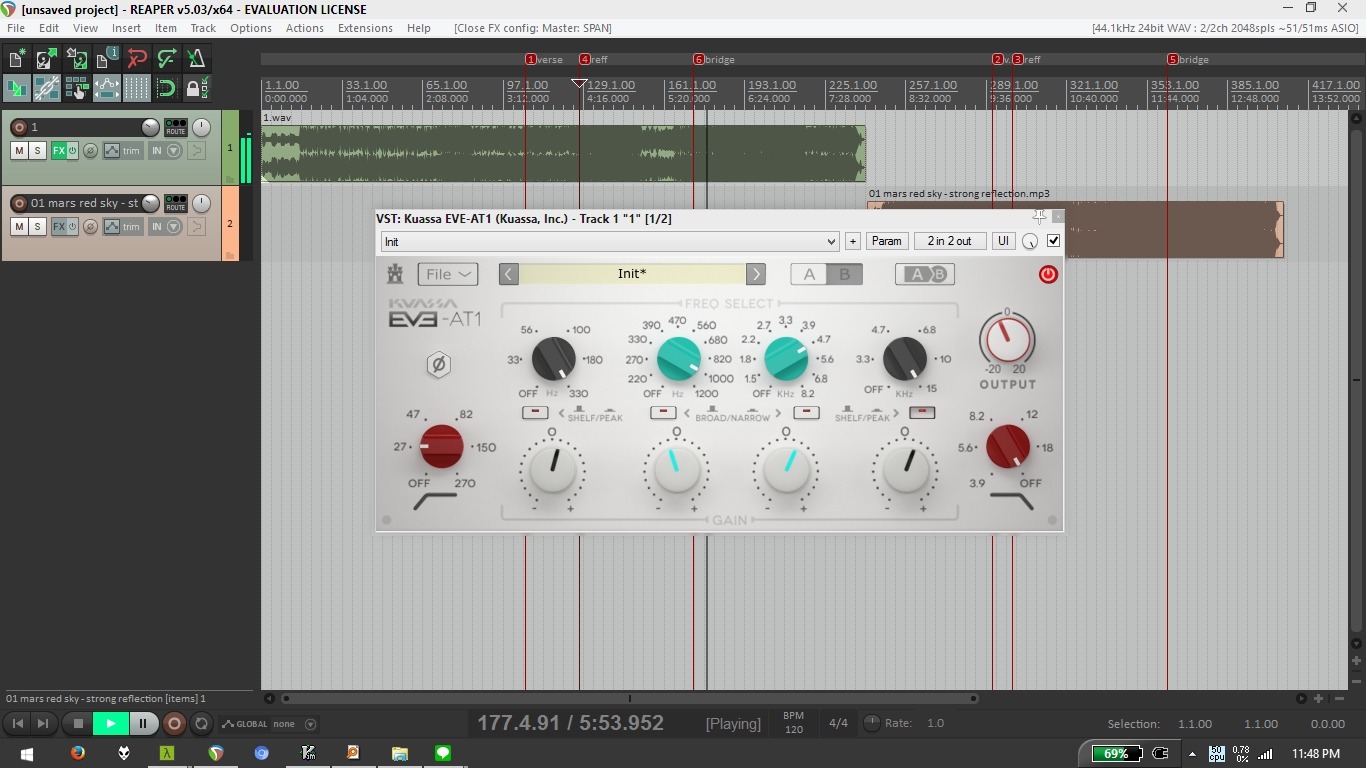
Fig 4: Tone balancing with Kuassa EVE-AT1
Now we’re ready to do some tone balancing. In Fig 4 we use the Kuassa EVE-AT1 equalizer to attempt to balance the tones of our two mixes. Try listening to the frequency ranges separately and jump frequently between the two mixes so that our ears do not have time to adjust to the changes in tone. This way any differences in tone will immediately jump out.
Here’s what we’ve done with our pre-master, in comparison with the reference material:
- Eliminate all frequencies below 27Hz using EVE-AT1’s high-pass filter which can cause rumble and problematic on most speaker systems.
- Add a bit of 330Hz with broad shelf to give a bit of extra punch on the kick drums.
- Attenuate the 1000Hz with broad shelf to remove muddiness on our mix
- Boosting the 4.7kHz with broad shelf to give presence to the mix
- Give a boost on the 15 kHz frequency with narrow shelf/peak to enhance the “Air” or extra detail of the overall mix.
- The we keep the low pass untouched since we want to preserve the airiness of the mix.
- Finally, compare with the previous setting using A/B compare button, or bypass the plugin to compare the before and after equalization.
Anyhow, these steps are merely to show the workflow we have done to achieve an overall tonal similarity with the reference material. So, you should not copy this settings since these won’t do your master any good. Each pre-master sounded different in tonality and what you want to achieve For further explanation about the EVE-AT1 workflow, you can watch this excellent video by Jerry Mateo so you can understand the “magic” behind a vintage modeled equalizer like Kuassa EVE series.
The mastering tutorials will be discussed one-by-one in a series of upcoming articles in our blog. So, be sure to subscribe to our newsletter.
*Edited and paraphrased from music production tutorials by our partner: ArtSonica. Previously known as MusikTek, ArtSonica is one of the first and biggest of audio engineering and music production school in Indonesia. The founder: Agus Hardiman is an award winning music producer, composer, music production teacher, book writer, and entrepreneur based in Jakarta, Indonesia.