Studio Gear can malfunction or stop working at any time. However, instead of immediately giving up, it is important to approach the problem with a logical and calm head. In this article, our product specialist “Uncle” Dimi go over some steps on how to troubleshoot your Recording Studio gear, including audio interfaces, and get it back on track.
Here is what happened to me recently. While I was watching my relatively old but loyal TV (around 10 years old), and browsing through the channels with the remote control, it suddenly stopped working and refused to restart. Of course, my first reaction was to panic, but I quickly realized that a cool head would improve my odds of successfully resolving the problem. So, I unplugged the TV from the power grid and decided to take a closer look. I wasn’t a TV technician, but I knew that there could be an obvious problem like broken cables or bad capacitors.
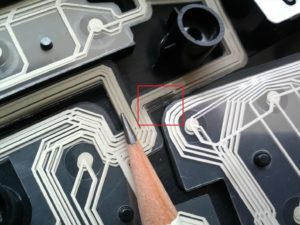
However, I kept my logical head and took the remote control apart to start figuring out the problem. I cleaned it thoroughly and noticed that the small diode lamp wasn’t sending a signal. Upon further inspection, I discovered that the graphite in a single area was mostly missing. So, I took an old pencil and used its graphite to fill the missing area. Then, before closing the two surfaces, I pressed arbitrary buttons, and voila! The TV started working again. This experience taught me that it is essential not to panic when something goes wrong with your gear and to approach the problem with a logical head.
So why am I sharing this story? This experience was very relevant to repairing your own music equipment before deciding to bring it to a professional. Even if you know you are not the professional for fixing the malfunctioning gear, keeping a logical head will at least help you to better understand and approach the problem. Before attempting any DIY fixes, always start with precautions and disconnect the equipment from the power grid to avoid any potential dangers.
Let’s look at some important trouble spots for your recording gear setup:
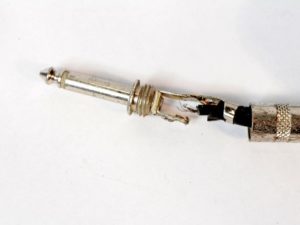
- Start with the most obvious and easiest issue, cords. Your signal can be killed or pick up hum if the
source: ifixit.com
- cords are not working properly. Keep a few good cords around as a substitute and if the cord is the problem, fix or discard it for good.
- After checking the cords, move onto the next obvious problem – Jacks. They can be tricky for a number of reasons, such as repeated plugging and unplugging that can bend them out of shape. The springy metal piece can also go after a while and stop making contact. Make sure all plugs are seated firmly in their jacks, as the connection must fit snugly. Check all other items like switches, pots, and ensure they are tightened.
- If the first two checks are good and you still do not have a good signal or any signal, start thinking about the next problem. Check if you’re reversing inputs and outputs. Sometimes when you plug into the effects box backwards, you won’t get any signal when the effect is in, but you’ll hear your signal when the effect is switched out.
Let’s talk about something that we face in modern digital audio workstation times: the Audio Interfaces.
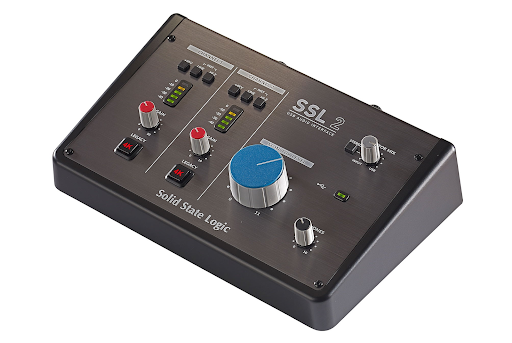
Are you experiencing issues with your audio interface?
Nowadays, audio interfaces are widely used in both home and professional studios, but sometimes they refuse to work or start acting strangely after powering your computer. Here are some steps on how to troubleshoot your audio interface and get it back on track:
- Check the power adapter. Make sure it’s not damaged, properly plugged in, and turned on. If the audio interface doesn’t power on, there may be an issue with the adapter. Check if you plugged the wrong adapter and make sure the amperage and voltage are correct.
- Verify the input connections. This includes the USB port, microphone input, and instrument input. Make sure the cables are properly inserted and the right devices are connected to the ports. You’ll also need to ensure that you have a strong USB connection to your computer for the audio interface to draw power. If you’re having trouble with the USB connection, try using a different cable.
- Check the output connections. Make sure the headphone cable and jack cable are properly inserted and functioning. You can test these connections on a different audio interface to be sure.
- Examine all the knobs and switches. This includes the volume knobs, line/mic switch, high-z switch, gain controls, etc. Make sure the volume and gain controls are turned up and that you have selected the right controls/switch for the particular input you’re using. The direct monitoring switch and high-z selector must also be set to the correct position.
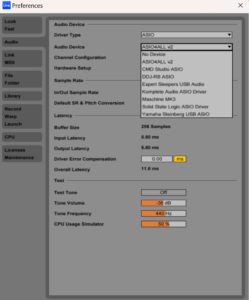 Ensure that your audio interface drivers are updated and installed correctly on your DAW computer. You should also check that the audio interface has been set up properly in your DAW. Select the corresponding ASIO driver from the manufacturer as the audio input and output port. The preferences or settings menu should be able to help you with this.
By following these steps, you’ll be able to identify and fix most common issues with your audio interface. However, if your Studio Gear recording gear still isn’t working properly after all these steps, it may be time to consider replacing it or sending it for repair.
It’s always best to start with the simplest solution before thinking about buying a new recording studio gear. This way, you’ll save yourself time and money and be able to get back to your DIY fix for your recording gear.
“Uncle” Dimi from Kuassa Team