Are you a guitarist on a budget, searching for ways to expand your sonic possibilities without breaking the bank? Look no further! In this article, we’ll show you how to build your own guitar effects pedals on a budget. Whether you’re a DIY enthusiast or looking for virtual pedal solutions, we’ve got you covered. Get ready to unlock a world of affordable creativity and take your guitar playing to new heights.
Guitar effect pedals are powerful tools that can transform your sound and elevate your playing experience. However, they often come with a hefty price tag. In this article, we’ll explore cost-effective alternatives by diving into the world of DIY guitar effects pedals. Whether you’re a beginner or an experienced builder, we’ll provide you with a step-by-step guide on how to create your own effects pedals without breaking the bank.
DIY Guitar Effects Pedals – Unlock Your Creativity on a Budget
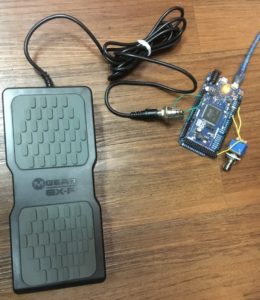
Kuassa Article: How to build your own Arduino Expression Pedal
Building your own guitar effects pedal is a great way to customize your sound and save money. There are many different types of guitar effects pedals available, so you can find one that suits your specific needs. If you are new to electronics, you can start with a simple pedal, such as a distortion pedal or a wah-wah pedal. As you gain more experience, you can move on to more complex pedals, such as delays and reverbs.
We will walk you through the step-by-step process of creating your own effects pedals, covering everything from the essential tools you’ll need to where to source components. Whether you’re a seasoned DIY enthusiast or just starting, this section will empower you to craft personalized effects pedals without breaking the bank. Not only do you save money, but you also have the freedom to customize your effects to suit your preferences. Let’s dive into the details of what you’ll need to get started:
Essential Tools for DIY Pedal Building:
The tools you will need to build your own guitar effects pedal will vary depending on the complexity of the pedal you are building. However, some basic tools that you will likely need include:
- Soldering Iron:
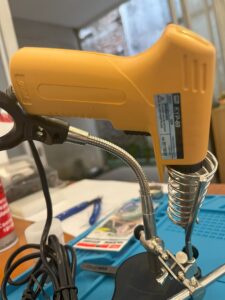
Soldering Iron
Look for a soldering iron with adjustable temperature settings to accommodate different soldering tasks. The wattage of the soldering iron you choose will depend on the type of projects you plan on working on. For most guitar effects pedals, a 25- to 30-watt soldering iron will be sufficient. If you plan on working on more complex projects, such as delays and reverbs, you may want to consider a soldering iron with a higher wattage. There are two main types of soldering irons: analog and digital. Analog soldering irons are less expensive and more common, but they can be difficult to control the temperature. Digital soldering irons are more expensive, but they offer more precise temperature control.
- Solder and Flux: Choose a high-quality solder and flux to ensure reliable connections and smooth soldering. When choosing solder, you will need to decide whether you want to use solder with a flux core or not. Solder with a flux core contains arosin, which helps to remove oxidation from the metal and prevents the solder from corroding. Solder without a flux core does not contain rosin, so you will need to use a separate flux.
- Other Tools: In addition to a soldering iron and solder, you will also need a few other tools to build your own guitar effects pedal. These include:
-
- PCB Holder: A PCB holder keeps the circuit board steady while you work, enabling precise soldering.
- Wire Cutters and Strippers: These tools are essential for cutting and stripping wires to the appropriate length and gauge.
- Multimeter: A multimeter helps you measure voltages, resistances, and continuity, ensuring accurate troubleshooting.
Components and Where to Source Them:
There are many different places where you can source the components you need to build your own guitar effects pedal. Several reliable sources provide electronic components for your DIY projects. Websites such as Mouser, or Digi-Key offer a wide range of resistors, capacitors, integrated circuits (ICs), and other components required for pedal builds.
Semi-DIY Kits and Pre-Built PCBs:
- If you are not comfortable sourcing your own components, you can also order a DIY kit. DIY kits typically include all of the components you need to build a specific type of pedal, as well as instructions. Some popular DIY kit retailers include websites like Mod Pedal and Amp Kits USA, PedalPCB, MusikDing.de and Build Your Own Clone offer comprehensive kits with all the necessary components and detailed instructions. Extra tip: look for a section with “beginner”, or “easy” for an easy build.
Building your own guitar effects pedals can be a fun and rewarding experience. It is also a great way to save money on FX pedals. There are three main ways to build your own guitar effects pedals: using a PCB, a partial kit, or a full DIY kit.
-
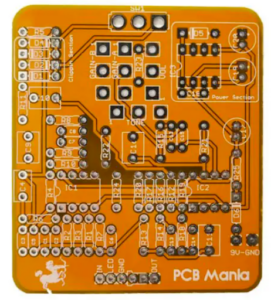
Source: https://pcbguitarmania.com/
PCBs are the most basic option. They are a baseboard with conductive pathways that allow components to be soldered together. To build a guitar effects pedal from a PCB with price from as low as $5 to $15, you will need to examine the Bill of Materials (BOMs), then source the components you need from a local electronic components shop or online. After all the required components list are complete, you can move to the fun part: solder the components to the PCB according to the schematic diagram. This can be a challenging task for beginners, but it is a rewarding experience.
- Partial kits are a good option for beginners who want to learn how to build guitar effects pedals without having to purchase all of the components separately. Partial kits include some of the components (usually the hard to find ones) you need to build a guitar effects pedal, but not all of them. You will need to purchase the remaining components separately (see above).
- Full DIY kits include all of the components you need to build a guitar effects pedal. Full DIY kits are a good option for new builders who want to build a specific type of pedal without a fuss on facing with not in stock components, or mistakenly ordering wrong components. You still need to be careful with soldering SMD components though.
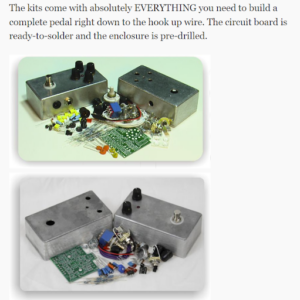
- Full DIY kits with Pre-soldered SMD components are the easiest to build a guitar effects pedal with fully populated PCB with the darn small SMDs, leaving you with the through-hole components (jacks, potentiometers) which relatively easy to solder on. This is the easiest, while the most expensive option, but still will save you roughly 50% of the price of a fully built pedal effect.
The best option for you will depend on your skill level, and budget. Here is a table that summarizes the different options:
| Option | Difficulty | Price |
| PCB | Difficult | Low |
| Partial Kit | Moderate | Moderate |
| Full DIY Kit | Easy | High |
|
Full DIY Kit with Pre-soldered SMD Components |
Easiest | Highest |
About SMD Components
While building your own guitar effects pedals, you may encounter Surface Mount Device (SMD) components. These tiny components offer advantages such as smaller size and improved performance but can be challenging to solder due to their size. Here are some tips for soldering SMD components with caution:
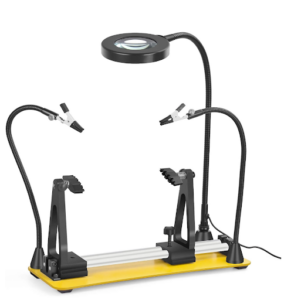
- Prepare Your Workspace: Ensure you have a clean and well-lit workspace to work with SMD components. A magnifying glass or a head-mounted magnifier can assist in seeing the small details more clearly.
- Choose the Right Tools: When soldering SMD components, precision is crucial. Use fine-tipped soldering irons specifically designed for SMD work. Additionally, consider investing in a pair of fine-pointed tweezers or specialized SMD soldering tweezers to hold and position the components accurately.
- Apply Flux: Apply a small amount of flux to the SMD pads on the circuit board. Flux helps improve solder flow and ensures reliable connections. Choose a flux suitable for SMD soldering, such as a no-clean flux or a low-residue flux.
- Soldering Technique: With SMD components, a technique called “drag soldering” is often employed. Apply a small amount of solder to the tip of the soldering iron and touch it to one end of the SMD component and the corresponding pad on the circuit board. Slowly drag the soldering iron along the component’s leads, allowing the solder to flow smoothly and create the necessary connections. Embed video: Drag soldering https://www.youtube.com/watch?v=YsB2gPcPRWY&t=270s
- Temperature and Time: Be mindful of the temperature of your soldering iron. Set it to a suitable temperature for SMD soldering, usually between 350-400 degrees Celsius (660-750 degrees Fahrenheit). Keep the soldering iron in contact with the component for a short period to avoid overheating and potential damage.
- Practice Patience: Soldering SMD components can be a delicate process that requires patience. Take your time to position the components accurately and ensure proper alignment with the pads. Avoid rushing the process, as this may result in poor solder joints or damage to the component or circuit board.
- Inspect and Test: Once you have soldered the SMD components, carefully inspect the solder joints under good lighting or magnification. Ensure that each joint is well-formed, with the solder flowing evenly and creating a strong connection. After completing the soldering, perform a thorough visual inspection and test the circuit to ensure proper functionality.
Building the Pedal
Once you have gathered all of your components and tools, you can begin building your pedal. The specific instructions for building your pedal will vary depending on the kit you have purchased or the design you are following. However, some general steps that you will need to follow include:
- Assemble the circuit board. This involves soldering the components to the circuit board in the correct order.
- Install the enclosure. This involves drilling holes in the enclosure for the jacks and knobs, and then mounting the circuit board inside the enclosure.
- Install the jacks and knobs. This involves soldering the jacks and knobs to the circuit board.
- Test the pedal. This involves connecting the pedal to your guitar and amplifier and making sure that it works properly.
- Finishing the Pedal. Once you have tested your pedal and made sure that it works properly, you can customize the looks by painting the enclosure or adding stickers. You can also add a battery compartment if your pedal requires one.
how to solder for DIY projects:
- Prepare your workspace. Make sure your workspace is clean and well-lit. You will also need a soldering iron, solder, and a soldering stand. If you are new to soldering, it is a good idea to practice on some scrap electronics before you start working on your DIY project.
- Choose the right soldering iron. The size of the soldering iron tip will determine the size of the solder joints you can make. For small DIY projects, a 25-watt soldering iron will be sufficient.
- Tin the soldering iron tip. Tinning the soldering iron tip means coating it with a thin layer of solder. This will help the solder flow more easily and prevent the tip from oxidizing.
- Heat the solder joint. Once the soldering iron tip is hot, touch it to the solder joint. The solder will melt and flow onto the joint.
- Add solder to the joint. Once the solder joint is heated, add a small amount of solder to it. The solder should flow smoothly onto the joint and form a shiny bead.
- Remove the soldering iron. Once the solder has flowed onto the joint, remove the soldering iron. The solder should solidify quickly.
- Inspect the solder joint. Once the solder joint has solidified, inspect it to make sure it is smooth and shiny. If the solder joint is not smooth, you may need to re-heat it and add more solder.
Here are some additional tips for soldering:
-
- Use flux to help the solder flow more easily. Flux is a liquid or paste that is applied to the solder joint before soldering. It helps to remove oxidation from the metal and prevents the solder from corroding.
- Use a good quality solder. Solder is available in different grades. For DIY projects, a 60/40 rosin-core solder is a good choice.
- Practice makes perfect. The more you solder, the better you will become at it. So don’t be afraid to experiment and practice on some scrap electronics before you start working on your DIY project.
Safety Precautions
When soldering, it is important to take safety precautions to avoid burns and injuries. These precautions include:
- Always wear safety glasses when soldering.
- Keep the soldering iron tip clean. A dirty soldering iron tip can cause poor solder joints and can be a fire hazard.
- Be careful not to overheat the solder joint. Overheating can damage the components and can cause the solder joint to become brittle.
- Dispose of solder scraps properly. Solder scraps can contain lead, which is a hazardous material.
By following these safety precautions, you can help to ensure a safe and enjoyable soldering experience.
Exploring Software-Based Guitar Effects – Affordable and Versatile
If you’re not into DIY or prefer a digital approach, software-based guitar effects pedals offer a budget-friendly alternative. We will guide you through the necessary equipment, such as audio monitoring setups and USB sound cards, to ensure optimal performance. Discover the world of virtual effects and learn about the free options available from Kuassa, a leading software provider. These cost-effective solutions open up a wide range of effects, allowing you to experiment and enhance your guitar tones without spending a fortune.
Here’s what you need to make the most of software effects:
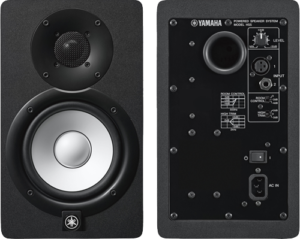
- Audio Monitoring Setup: To ensure accurate monitoring of the effects produced by software pedals, it’s recommended to have a good pair of monitor speakers or high-quality headphones. This allows you to hear all the nuances and details of your guitar sound.
- USB Sound Card or Audio Interface: A USB sound card or audio interface is essential for connecting your guitar to your computer and achieving high-quality audio recordings. It converts the analog signal from your guitar into a digital format that can be processed by the software pedals.
- Mid-End PC/Laptop: While high-end computers are not necessary, having a decent mid-range PC or laptop will suffice for running software effect pedals smoothly. Ensure that your system meets the minimum requirements specified by the software manufacturer for optimal performance.
Free Software Guitar Effects Pedals from Kuassa:
Kuassa offers a range of free software guitar effects pedals that deliver high-quality sounds and a variety of effects. Here are some notable options:
- Efektor Silencer: A noise gate plugin that eliminates unwanted noise and hum from your guitar signal.
- Efektor GQ3607: An equalizer plugin for precise control over the frequency spectrum of your guitar signal.
- Amplifikation Lite: A guitar amp simulation plugin that provides authentic tube amp tones with essential controls.
- Pillar Power Amp: A power amp simulator plugin that adds warmth and color to your guitar tone.

Furthermore, Kuassa’s Amplifikation 360 serves as a comprehensive virtual pedalboard, offering a multitude of free modules to explore and experiment with different effects.
Conclusion:
Don’t let a limited budget hold you back from achieving your desired guitar tones. Whether you choose the hands-on approach of building DIY guitar effects pedals or prefer the convenience of software-based solutions, there are cost-effective options available to enhance your guitar playing experience. By following our step-by-step guide, you can build custom effects pedals tailored to your preferences or explore the vast world of software guitar effects with Kuassa’s free offerings. Embrace these budget-friendly alternatives and unlock a world of creativity without breaking the bank