The first part of Kuassa’s mastering tutorial. To start mastering, start by by getting familiar about the gears you own to make sure it doesn’t get you in the way. Before we discussed about the whole mastering workflow one by one, here’s the first and most important part of the Mastering tutorial:
Know Thy Gear
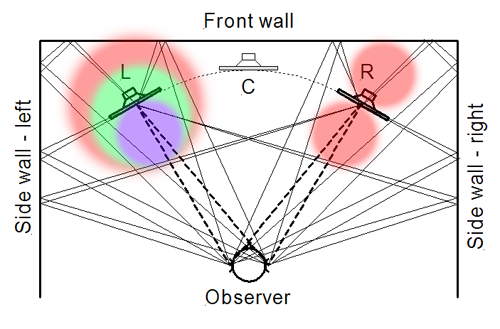
Room reflections. Image credits: http://www.linkwitzlab.com/
Your monitoring gear, speakers and headphones alike, are most probably inaccurate. For speakers, this problem is compounded by placing them in an acoustically untreated room, where it turns out that what we hear is not just sound directly from the speakers, but a combination of direct sound and room reflections. Room reflections from various parts of the room reach our ears at different times, usually up to 50 ms after the direct sound (depending on the size and absorption of the room). 50 ms is a pretty short time interval, and makes room reflections difficult (but not impossible) to perceive.
Room reflections lead to all kinds of undesirable effects that may invalidate mastering decisions, chief among them being filtering (either boosting or cutting) of particular frequency ranges and a loss of transient clarity. This effect is particularly nasty at the low end of the frequency range. On the other hand, relying on headphones to assess the low end often leads to inaccurate translation to other media.
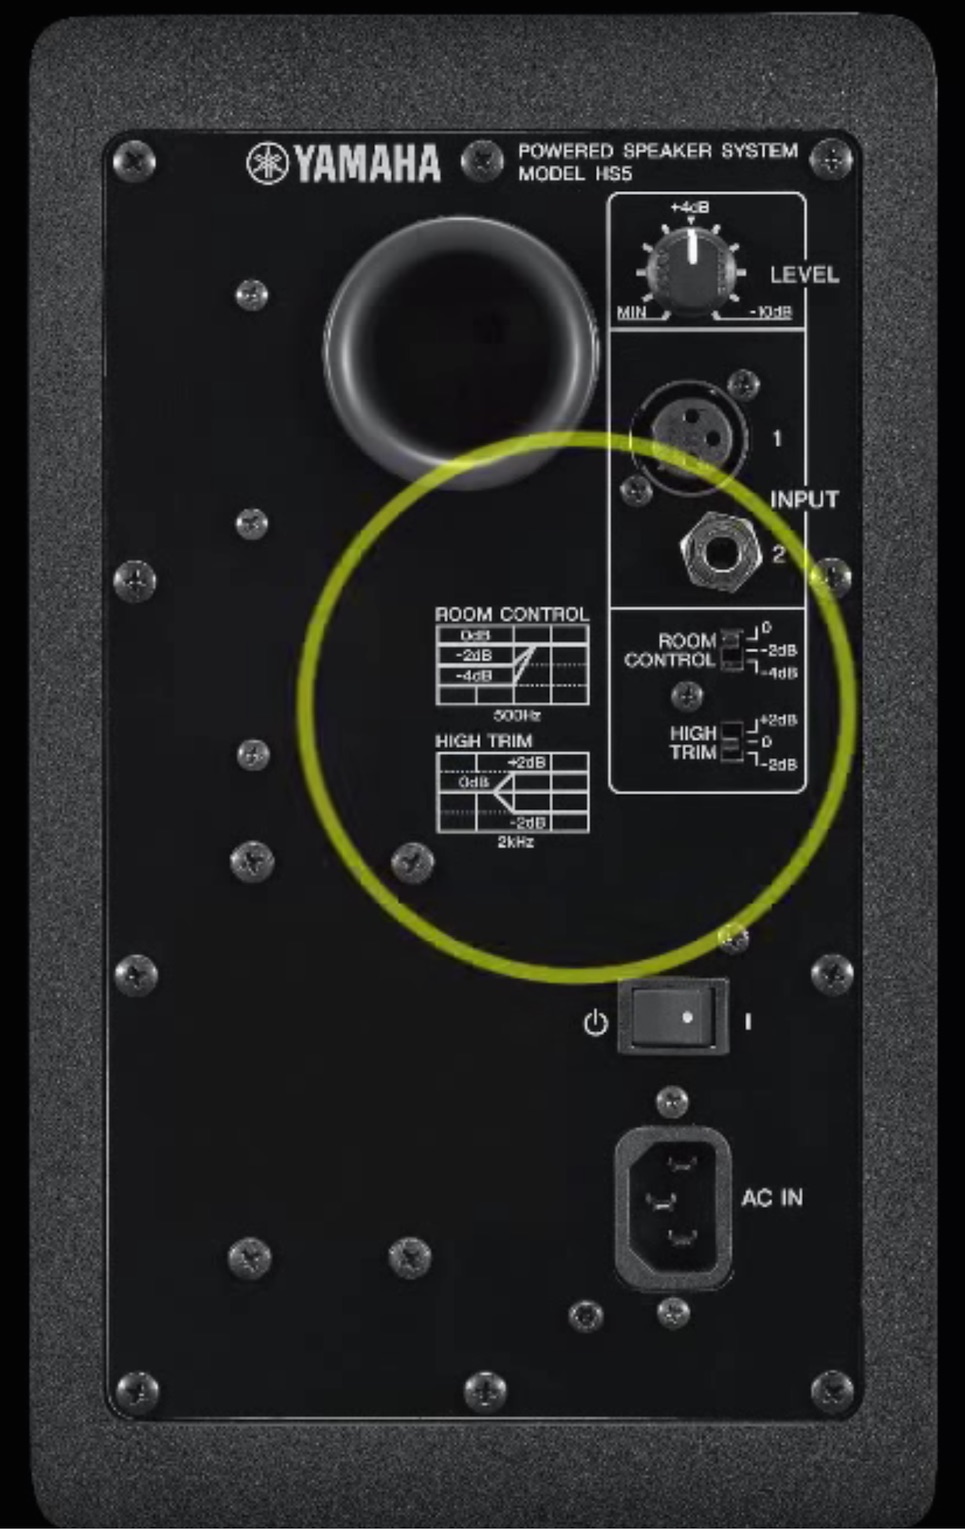
Room compensation switches. Source: http://blog.artsonica.com/
The best way to remedy room reflections is by consulting an acoustician and treating your room. This can be expensive though, and various do-it-yourself and homebrew methods are documented online that achieve some measure of the effect of professional solutions at a fraction of the price. In addition, tweaking the compensation filters of your monitor speakers, if available, may help alleviate some of the problems due to the room. This can be done by adjusting the switches on the back of most monitor speakers labeled “High Trim” (for high frequencies), and “Room Compensation” (for lower frequencies) in compare with the sounds of the speakers when located in two or more rooms. The aim is to adjusting the speakers so its relatively sounds similar between each of the rooms in comparison.
About headphones, it’s common knowledge that mixing or mastering using headphones is a bad idea. While a great pair of headphones usually have a same price with a budget studio monitors, and won’t be affected by bad room acoustics. So why no headphones?
The first reason is, headphones can’s translate the spatial depth of the mix well, so your sense regarding soundstage and stereo wideness can be ruined. The second reason, is that every headphones translate differently to different person due to difference in fit, head size, etc. In addition, change in headphone position in each session might change the frequency translation resulting inconsistencies.
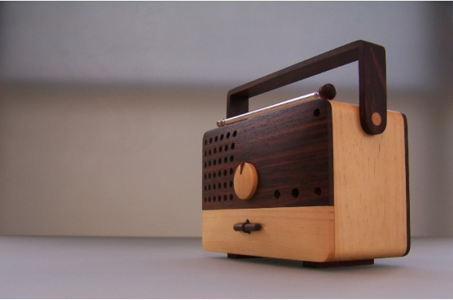
Try checking your master here. Source: http://www.magno-design.com/
While in certain conditions mastering using improper room conditions or headphones are unavoidable, make sure to know your gear well, and compare your mastering result within many environments, whether a hi-fi home theater, to your dad’s mono speaker, or even crappy iPod earbuds to make sure the result is somehow acceptable between those environments.
To sum up:
- Know that your room may alter the frequency response of your speaker monitors
- consider treating the acoustics of your room, or use room compensation switches on your speaker
- Headphones or untreated room acoustics can still be alternative, but you need to know certain drawbacks caused by them
- Check your master across different set of speakers, rooms, and even earbuds.
With that out of the way, let’s discuss the mastering process as a whole. Roughly and generally speaking, to achieve a good master we need to do:
- Know your gear and environment
- Use plugins and references appropriately
- Equalization
- Dynamic balancing
- Stereo widening
- Character building
- Level maximizing
Which will be discussed one-by-one in a series of upcoming articles in our blog. So, be sure to subscribe to our newsletter.
*Edited and paraphrased from music production tutorials by our partner: ArtSonica. Previously known as MusikTek, ArtSonica is one of the first and biggest of audio engineering and music production school in Indonesia. The founder: Agus Hardiman is an award winning music producer, composer, music production teacher, book writer, and entrepreneur based in Jakarta, Indonesia.